> For the complete documentation index, see [llms.txt](https://docs.wardenswap.finance/warden/llms.txt). Markdown versions of documentation pages are available by appending `.md` to page URLs; this page is available as [Markdown](https://docs.wardenswap.finance/warden/how-to/arbitrum-bridge-tutorial.md).
# Arbitrum Bridge Tutorial

*In order to bridge the assets, make sure that your wallet like Matamask or other wallets has ETH on the Ethereum mainnet.*
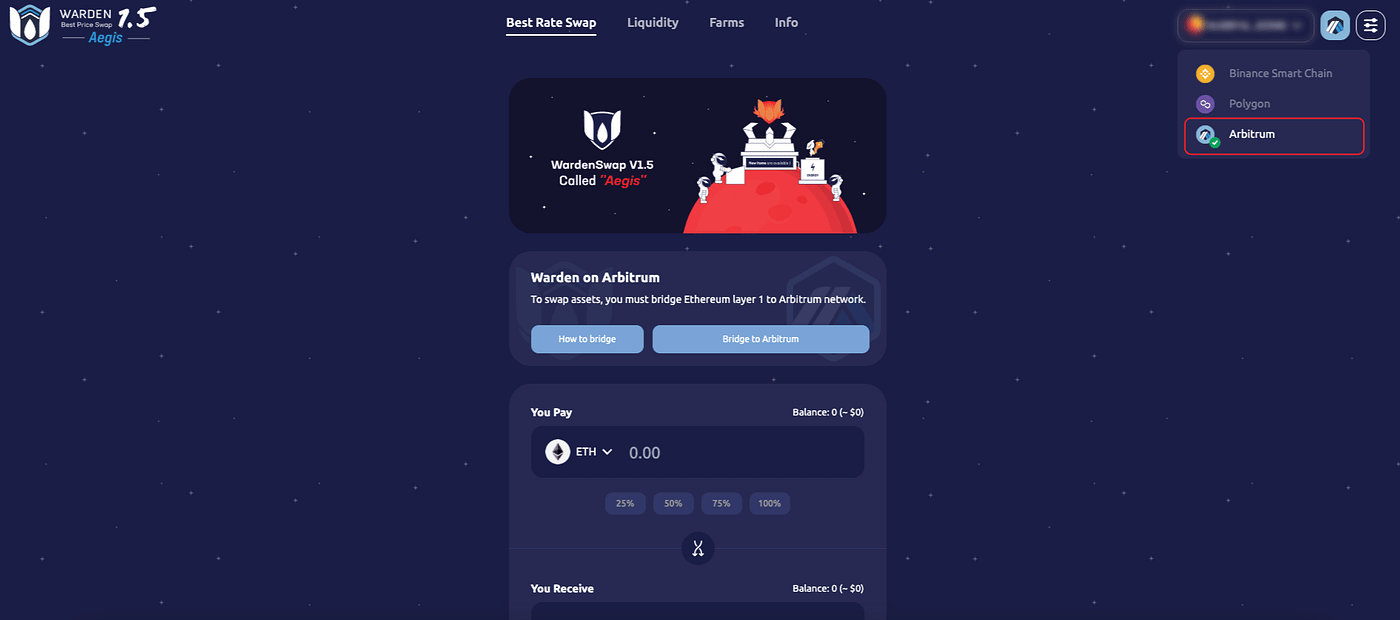
### 1. Add ‘Arbitrum one’ network on Wardenswap.finance
* To add ‘Arbitrum one’ network, visit [wardenswap.finance](https://www.wardenswap.finance/#/best-rate-swap) website.
* Click on ‘Chain’s logo’ and select Arbitrum network.
* Follow the steps on MetaMark → Approve → Switch network.
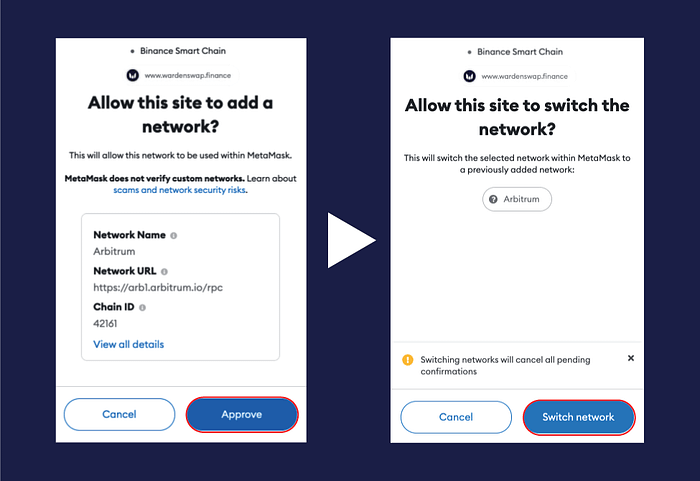
* After switching network, Arbitrum network will be shown on top of MetaMark pop up.

### 2. Bridge your ETH/TOKENS (L1 → L2)
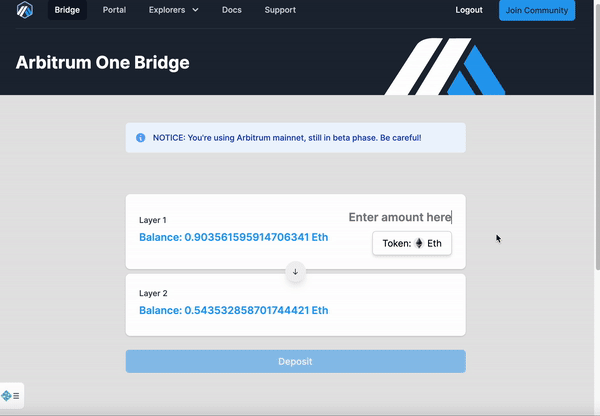
* To bridge token assets, visit [bridge.arbitrum.io](https://bridge.arbitrum.io/) website.
* Make sure your wallet is connected to the Ethereum mainnet network.

* Select the ETH or ERC-20 to bridge in the token drop-down menu.

* Enter the amount of ETH/tokens you want to bridge over in the “L1” field and then press “deposit”. Follow the steps on Metamask.
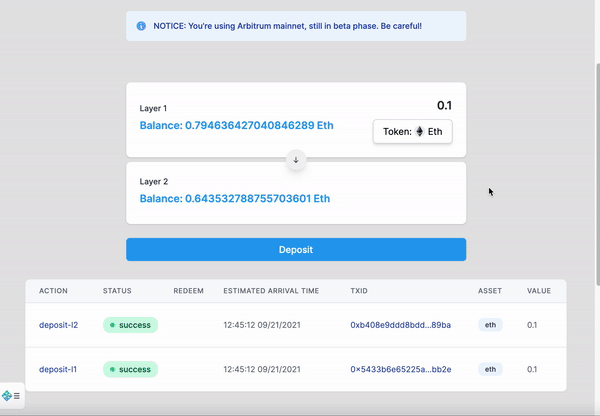
* After submitting the transaction, the process is expected to arrive on Arbitrum One within roughly 10 minutes to an hour depending on congestion.
* Also, make sure your MetaMask wallet is set to the Arbitrum One network so you can see your funds when they arrive.
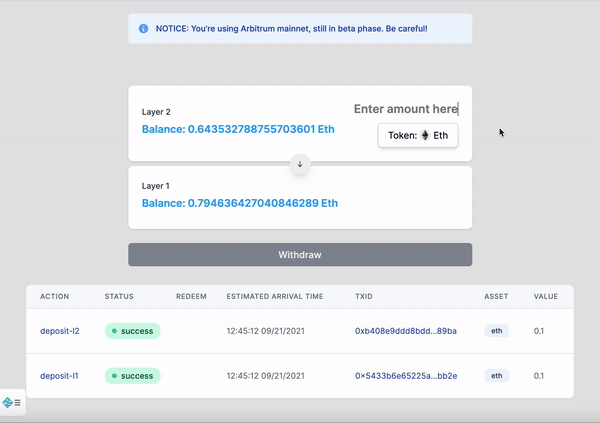
## How to withdraw your ETH/TOKENS (L2 → L1)
> Note!: The withdrawal period is 7 days after sending your assets through the bridge to receive them on the mainnet.
* Make sure you are connected to the Arbitrum One network and **have some ETH on your wallet as transaction fees**.
* Click the arrow in the middle of the page, then select the token you want to bridge in the drop-down menu.
* Enter the amount of ETH/tokens you want to bridge over in the “L2” field and then press “withdraw”. Follow the steps on Metamask. After the fraud proof window has closed, press on “claim” and your funds will be available in your wallet!
> Note!: The withdrawal period is 7 days after sending your assets through the bridge to receive them on the mainnet.
***Reference:***